| |||||||
|
|||||||
|
|
|||||||
|
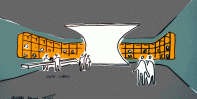
1. Create alternate renderings in Sketchup. Create or develop a Sketchup model, saving views as Tourguide Pages. Select the most telling view, then articulate more detail and add entourage where it matters most. Following the “Dennis technique” guidelines, create 3000 pixel wide JPG renderings with 1) color texture & shadows, 2) line art, and 3) line art & shadows. Use the Window > Model Info dialogue box to adjust colors of Edges (lines), Background, Sky & Ground. If you also save a version with bold colors for materials and sky you can select them easily. In Sketchup, File > Export 2D Graphics > Options allows you to uncheck “set view size” to set the size of the rendering; Unchecking “Anti-alias” gives pure lines and blocks without blended colors for clean shape selection. (See examples in Andromeda2.uoregon.edu, RESOURCES > week 7) 2. Overlay renderings as Photoshop Layers Open, copy and paste the images on top of each other. Use the Layer Properties > Multiply to add the drawings on top of the traditional rendering. Select materials glass and wet pavement, paint in streaky colors for reflections. Add a matching sky, ground plane & entourage.
Try matching one of Seth Moran’s example image styles OR create your own variation, experimenting with Filters to soften lines and images.
3. Experiment with a Graphic Title & Colors Consider the character of your rendering, give a descriptive name or title to the image and find a font that conveys its spirit. Load the font into your system font folder and try placing the font at different sizes in Photoshop. Experiment with adjusting the background / foreground colors.
4. Save and publish to the Web Save the final image first as a layered PSD file. Then use Image > Image Size to resize it to 600 pixels wide, save as a high-quality JPG. Use GoLive to duplicate your assignment01 folder, place the JPG in the new assignment_images folder, then edit the assignment02.html with a description of your project. Optionally save and include small JPG images from your process.
For the Advanced:
Evaluation Criteria Concept
Design Quality
Technical Competence
Completeness
References Sketchup Links |
|||||||
|
|
|||||||
|
|
|
||||||
|
|
|||||||