| |||||||
|
|||||||
|
|
|||||||
|
1. Find a model, add a component. Use one of the samples from the FormZ CD as a theatrical stage set. Add at least one model components by building or using 3D model shareware sites or your FormZ CD. 2. Choose the images Find three contrasting images of buildings or interior spaces which capture your imagination.. You can use the images below or find an image in the public domain from a source such as the U.S. Library of Congress' American Memory Website or Web Gallery of Art. Save the digital images, noting source references and create small thumbnails to post with your work.
2 left images courtesy of the Frances Loeb Library, Graduate School of Design, Harvard University, near right Canaletto's Doge Palace from Web Museum of Art, right image Library of Congress, Prints and Photographs Div., Gottscho-Schleisner Collection 3. Match the viewpoint & framing For perspectives, trace lines in the image to find vanishing points and the horizon line. For axonometrics, find the angles of the major axes. For either, determine which planes are being emphasized and how cropping is used in relationship to the major planes shown. Using view control tools match the views as closely as possible in your project. Save a series of attempts so you can compare different possibilities. You can choose which faces of the project to highlight by rotating the view. 4. Match the lighting For daytime and dusk shots, adjust the sun position in relationship to your model. Adjust the brightness and contrast and the color of the background and sky. For electrical lighting, insert lights and adjust the balance between the natural and electrical lighting. 5. Adjust key materials Select two key textures which are most critical for giving scale to your image. With the Tex-Map command, adjust the size of the textures, being careful not to overwhelm the forms. (Use colors rather than inappropriate textures). Remember that toning down colors and textures can help unify an image. 6. Test render & make adjustments Test out view, lighting, material and background choices by rendering in a small window. Add more elements to your model to create a pleasing composition. Gradually work up to a Full Z-buffer rendering with shadows at 600 x 400 pixels. Also save thumbnail images at 200 x 133 pixels. 7. Reflect, write and upload For Assignment 8, upload your thumbnails linked to the larger images with the original reference images and explain what techniques you used to get them to match. FOR THE ADVANCED |
|||||||
|
References Rob Polevoi's 3D Animation Workshop, Lessons 18-21 Jeremy Birn's Digital Lighting and Rendering FormZ Overview by Dr. Samantha Krukowski and Scott Nyerges of Univ. of Texas Austin Joe Wood, Massachusetts College of Art's Intro to FormZ Modeling - Birdhouse (good not complete) Tutorials from Inside FormZ Inside form·Z by Eden Muir, Cory Clarke, Nam-ho Park (uses older icons) Kenth Agurrell's Tips & Tricks and the FormZ Desktop Companion http://formz.com/forum/tutorials_by_users.html Harvard Lanscape Architecture - Locating Ballparks using georeferenced images Texture Mapping by Mark Thurnauer, Miami University
|
|||||||
|
|
|
||||||
|
|
|||||||


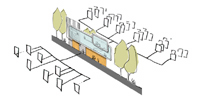 Problem: Use a given model as a theatrical set and render it two ways.