by John Park
|
| STEP 1: Overview |
This tutorial will show you one method that allows users to navigate through your website. We will be using IMAGE MAPS (aka, Hotspots). The idea is to create a single image that contains areas that will act as hotspot buttons which when clicked will send the browser to another HTML page. The advantage of using an image map is that you have all the freedom of formatting your image and it's content. The 'image map' can be of any visual format: hand-drawn, photographic, typographical, vectorized, abstract, etc. All that matters is that you output this image to a JPG (or GIF) that is an appropriate size.
|
| STEP 2: Make the Map and insert it into DW |
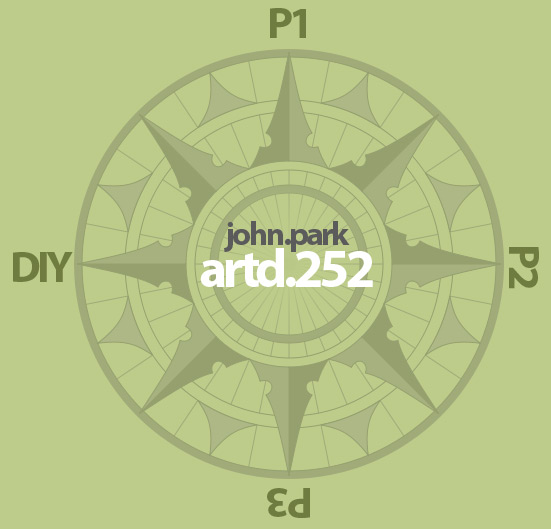
Let's Assume that you have finished your graphic/map and are ready to export it from photoshop. For the sake of this exercise, this will be my Image Map (below). Please note that your image map can be of ANY STYLE that you choose. By no means does your image map have to look like mine. If want a less literal Index page, perhaps you will want graphical/icon representations of each project instead of simple "P1", "P2", etc. It's up to you. Be creative!
First let's check the image size because we don't want the image map to be too large. In Photoshop you can do this by going to IMAGE>IMAGE SIZE:
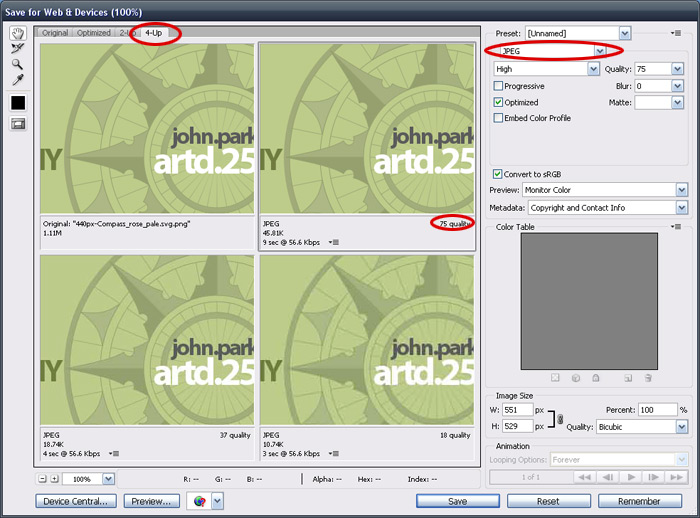
We want to make sure that BOTH of the dimensions are smaller than 955 pixels wide and 600 pixels high. After you change those settings, click OK. Now we are ready to export the image to a web-friendly image format AND compression. Remember that the higher the image SIZE and the higher the QUALITY (less compressed) the higher the file size. The big problem with large file sizes is that it takes a long time for the images to load, especially for those with slower internet connections. Luckily, Photoshop has a good exporter for internet images. Go to FILE>SAVE FOR WEB and choose JPG as the file type (see image). We also want to look at the '4up' view to see four different views of the compression type and how they affect the image quality and file size (you need to strike a good balance between these two aspects).
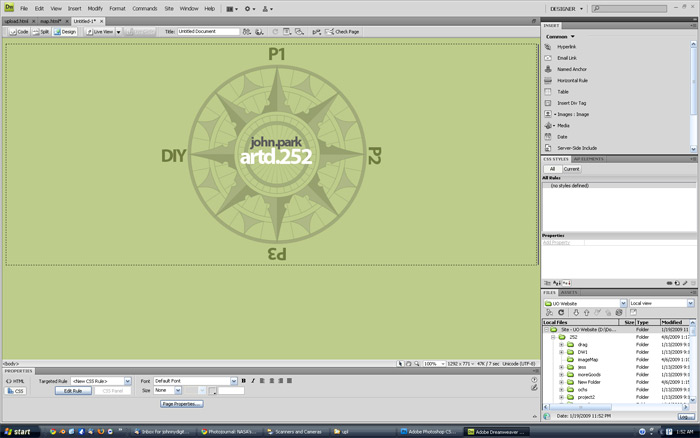
Now let's bring this image into Dreamweaver. Make sure you have a new HTML page open and ready. Go to INSERT>IMAGE or hit the little tree icon to insert a picture: Once the image is in DW, it will look something like the below image. You can format it to be centered if you want. Also, you can set the background color of the HTML page to match the color of your background image if you want. I will make those two changes: Before Formatting:
AFTER FORMATTING: The center align button can be found in the PROPERTIES palette (often at the bottom of the DW interface).
|
| STEP 3: Adding the Image Map (hotspots) |
NOW we are ready to add hotspots. As you might imagine, I will add four hotspots to the one image. There will be separate hotspots for Project1, Project2, Project3 and the DIY Project. Upon clicking on each button, the user will be directed to a new HTML page that contains that project. So you will want to set up some dummy HTML pages, one for each project, that will stand in for your real project pages. When you complete each project you can update the links and replace the temporary HTML page with the real project HTML page. To add the hotspots to the image map, you must click once on the image to select it. Now in the PROPERTIES panel you should see an area called "Map". If you don't see it, make sure you have the image selected. in DW CS3 in DW CS4 (You could also have the hotspot be an oval shape or a point-by-point drawn custom shape if you desire). |
| STEP 4: Creating the link |


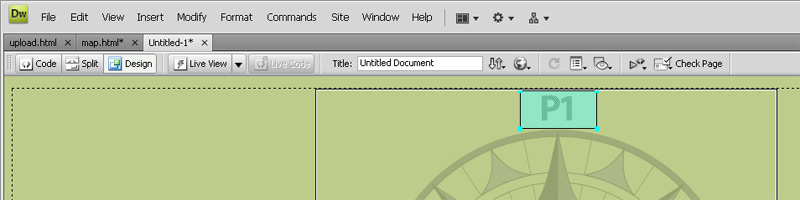
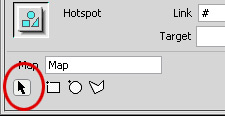
The final step is to make the hotspot correspond to a linked HTML file. To do this, click on the little pointer icon in the MAP area of the PROPERTIES panel (see below)
Click on the turquoise colored hotspot that you made, and notice the 'Link' area in the PROPERTIES PANEL. This is where you add the link to the HTML file that will open when the user clicks. If you click on the little folder icon near the LINK box, you can choose a local HTML file, or if you want to open an HTML page on the web, you can enter in a remote URL (ie, http://www.google.com).
You can repeat this process for all four (or as many hotspots as you want) spots and set individual links for each one. If you want, you can test out your work by going to FILE>PREVIEW IN BROWSER.
Here is what mine looks like:
in Dreamweaver:
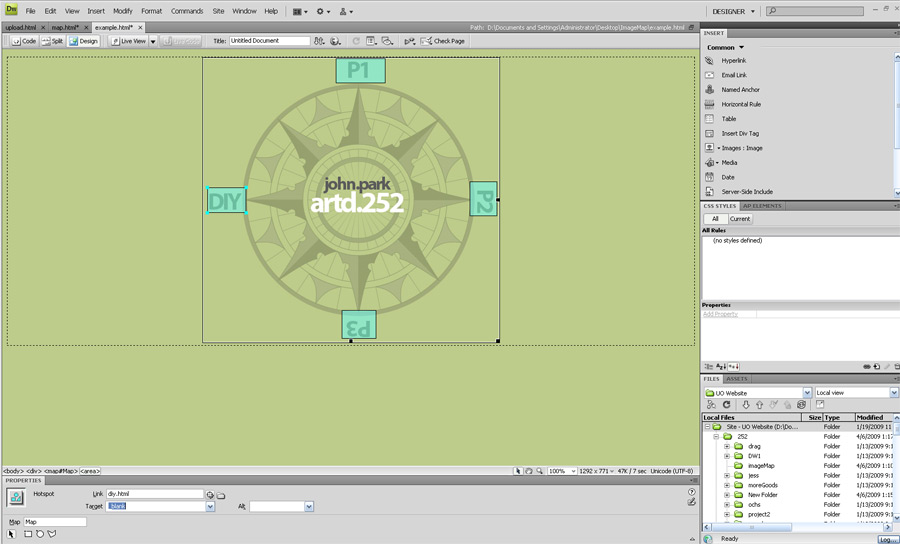
AND THE WORKING EXAMPLE CAN BE FOUND HERE: Image Map Example
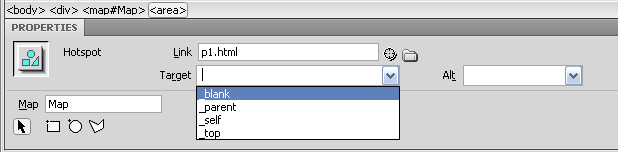
As a final note. After you set a link you have a drop down option for the 'Target'. This means, when the user clicks on a link do you want the current page to be replaced by the new one (_self) or do you want to open a new browser page/tab (_blank).