|
|||||||
T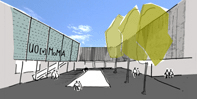 his week, create a first version of your courtyard sculpture using subtractive carving and additive components. Next week, develop the setting for the sculpture using geometric patterns, then create renderings by framing views and manipulating light. In the following week, enrich the renderings with photocollaged context. his week, create a first version of your courtyard sculpture using subtractive carving and additive components. Next week, develop the setting for the sculpture using geometric patterns, then create renderings by framing views and manipulating light. In the following week, enrich the renderings with photocollaged context.
1. Engage Throughout the term, students will give review comments to different classmates so each person receives a variety of feedback.
Begin with a simple rectilinear platform and use the push/pull function to sculpt a base. Think of the plastic nature of concrete as you try extruding supports and carving voids that echo the upper structure. Try selecting and adjusting faces and edges. Creating a family of like forms can give continuity to your design. 4. Design an expressive wood structure Create a typical wood stud by drawing a 2" x 4" rectangle and extruding it up 8', typing the dimensions. The exercise will be easier if you assume uncut lengths and make the first stud into a Component (mouse context menu). Use as few or as many members as you like. Experiment with Move+copy, rotate+copy and mirror (scale with dragging inside out) to generate configurations of the wood studs.
5. Render & Export Images Find and save interesting views (Window menu > Scenes > +. Select File > Export > 2D Graphic. Save as a JPG (medium quality) and use the “Options” to adjust the image resolution, in this case Width/Height to 600 x 400 pixels and make sure that “Anti-Alias” is enabled. Rename your favorite two images according to the 610.2a.jpg, 610.2b.jpg, etc. convention. Include an additional plan view that is not in perspective: 610.2c.jpg. 5. Present it on ePortfolios
Check your work against the evaluation criteria. Develop the model and find new pleasing views. For the ambitious:
Lionel March and Philip Steadman's The Geometry of Environment: Ch. 3 Symmetry Groups ARTISTS Mary Miss Jackie Ferrara Lawrence Halprin James Harrison, UO Straub Hall Courtyard Laslo Maholy Nagy images SOFTWARE HOW-TO Lynda.com Sketchup Video Tutorials OSU Mike Bailey's Sketchup Guide (PDF) Sketchup User's Guide |
|||||||
 |
|||||||